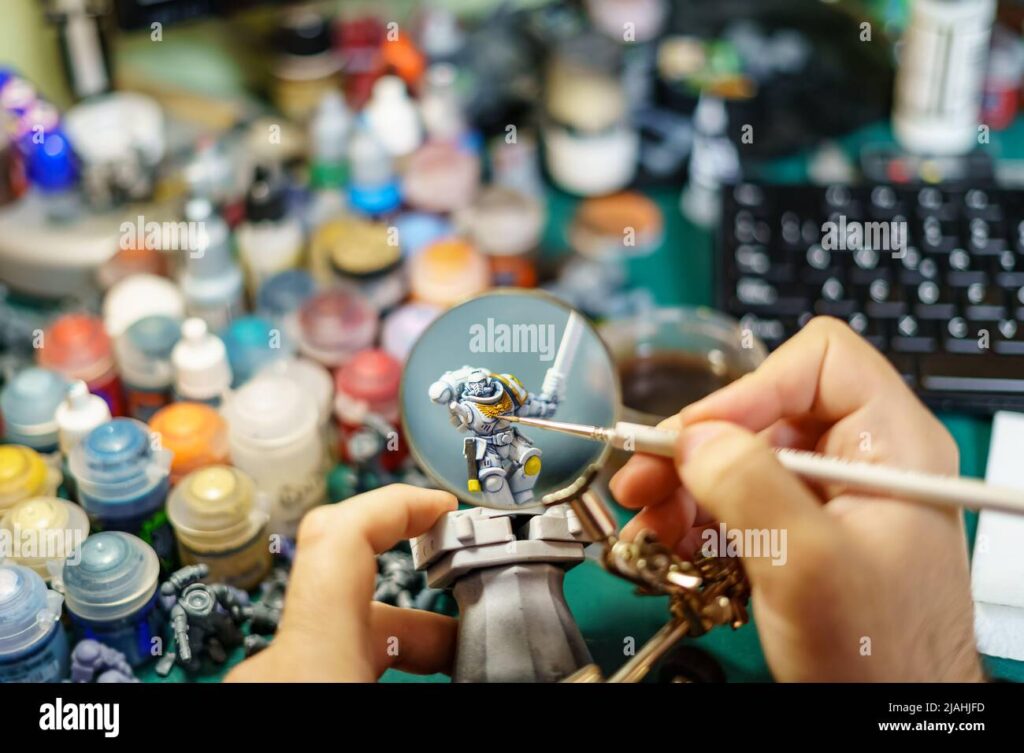
Miniature painting is an art form that blends patience, precision, and creativity. Whether you are a beginner eager to explore the world of miniatures or an experienced painter looking for advanced techniques, this guide will provide you with valuable insights into various miniature painting techniques. From basic methods to advanced approaches, we aim to equip you with the knowledge and tools necessary to elevate your miniature painting skills.
Miniature painting has evolved into a highly respected hobby with a passionate community. The thrill of transforming a simple figure into a beautifully detailed piece of art is unmatched. The journey from a primed model to a finished masterpiece involves several stages, each requiring different techniques and tools. Understanding these techniques not only improves the quality of your work but also enhances your overall experience as a miniature painter.
In this article, we will delve into the following topics:
- Basic Miniature Painting Techniques
- Intermediate Miniature Painting Techniques
- Advanced Miniature Painting Techniques
- Specialized Techniques
- Tools of the Trade
- Tips for Improving Your Miniature Painting Skills
By mastering these techniques, you can bring your miniatures to life, creating pieces that stand out on the tabletop or in display cases. Let’s embark on this artistic journey together and unlock the secrets of miniature painting.
What Are the Various Techniques I Can Use in My Miniature Painting?
Basic Miniature Painting Techniques
Base Coating
Base coating is the foundation of miniature painting. It’s the process of applying a solid layer of paint to your miniature, covering all the areas that will later be detailed. This technique is essential for creating a uniform color scheme and ensuring that subsequent layers of paint adhere properly.
Why Base Coating Matters
Base coating is crucial because it sets the stage for the rest of your painting process. A good base coat can make a significant difference in the final appearance of your miniature. It provides a consistent surface that allows other paints to adhere better and prevents the underlying material from showing through.
How to Base Coat Effectively
- Choose the Right Primer: Start by priming your miniature. Primer helps the paint adhere better and provides a smooth surface for painting. For best results, use a spray primer that matches the color scheme of your miniature.
- Thin Your Paints: Use a palette to thin your paints with water or a medium. This ensures even coverage and prevents the paint from obscuring fine details.
- Apply Multiple Thin Layers: Instead of applying one thick layer of paint, use multiple thin layers. This helps achieve a smooth, even finish without losing detail.
Recommended Products for Base Coating
- Vallejo Surface Primer: A versatile primer available in various colors.
- Citadel Base Paints: High-quality paints specifically designed for miniature base coating.
- Army Painter Mega Paint Set: A comprehensive set that includes a wide range of colors and primers.
- Reaper Master Series Paints: Known for their excellent coverage and smooth application.
- Vallejo Model Color Paints: Ideal for both base coating and detailed work.
- Citadel Spray Primer: Provides a smooth and consistent base for painting.
- Army Painter Spray Primer: Quick and easy application, perfect for large batches of miniatures.
- Reaper Miniatures Paints: Offers a wide variety of colors with great consistency.
Washes and Shading
Washes and shading are techniques used to add depth and dimension to your miniatures. A wash is a thin, watery paint that flows into the recesses of your miniature, creating shadows and enhancing details. This technique is excellent for quickly adding realism and depth to your miniatures.
How to Use Washes and Shading
- Choose the Right Wash: Select a wash that complements your base color. For example, a brown wash works well with earthy tones, while a black wash is ideal for darker colors.
- Apply Evenly: Use a large brush to apply the wash evenly over your miniature. Allow it to flow into the recesses and avoid pooling in unwanted areas.
- Remove Excess Wash: After applying the wash, use a clean brush to remove any excess from raised areas. This helps maintain the highlights and prevents the miniature from looking too dark.
Recommended Products for Washes and Shading
- Citadel Shade Paints: High-quality shades designed specifically for miniatures, available in various colors.
- Army Painter Quickshade Washes: Known for their excellent coverage and ease of use.
Advanced Tips for Shading
- Layering Washes: For more depth, apply multiple layers of wash, allowing each layer to dry before applying the next.
- Custom Washes: Mix your own washes by thinning acrylic paints with water or medium to achieve the desired effect.
Dry Brushing
Dry brushing is a technique where you use a brush with very little paint to highlight the raised surfaces of your miniature. This method is perfect for adding texture and bringing out details that might otherwise be missed. To achieve the best results, use dry brushes for miniatures specifically designed for this technique.
How to Dry Brush Effectively
- Choose the Right Brush: Use a stiff-bristled brush for dry brushing. Dedicated dry brushes for miniatures are ideal for this technique.
- Remove Excess Paint: Load your brush with paint and then remove most of it by wiping it on a paper towel. The brush should appear almost dry.
- Lightly Brush Over Raised Areas: Gently brush over the raised areas of your miniature, allowing the paint to catch on the edges and textures.
Recommended Products for Dry Brushing
- Citadel Dry Paints: Specially formulated for dry brushing, these paints have a thicker consistency.
- Army Painter Drybrush Set: Includes a variety of brush sizes for different applications.
- Vallejo Game Color Dry Brush: High-quality dry brush paints that provide excellent results.
Tips for Advanced Dry Brushing
- Multiple Colors: Use multiple colors when dry brushing to create more complex highlights and textures.
- Directional Brushing: Brush in different directions to avoid creating a uniform look and to enhance the natural texture of your miniature.
Intermediate Miniature Painting Techniques
Layering
Layering involves applying multiple thin coats of paint to build up color and create a smooth gradient. This technique is crucial for achieving realistic skin tones and other complex color transitions. The key to successful layering is patience and the ability to blend colors seamlessly.
How to Layer Paint
- Thin Your Paints: Use a palette to mix your paints with water or medium, achieving a consistency similar to milk.
- Apply Thin Layers: Apply thin layers of paint, allowing each layer to dry before applying the next. This helps build up the color gradually without obscuring details.
- Blend Colors: For smooth transitions, blend colors by applying a slightly lighter shade over the previous layer and feathering the edges.
Recommended Products for Layering
- Vallejo Model Color Paints: Excellent for layering due to their smooth consistency and wide range of colors.
Advanced Tips for Layering
- Color Theory: Understanding color theory can help you choose the right shades for layering and create more realistic effects.
- Practice: Layering requires practice and patience. Experiment with different colors and techniques to find what works best for you.
Glazing
Glazing is a technique where you apply a thin, transparent layer of paint over a base coat to alter its color and add depth. This method is ideal for creating subtle color changes and enhancing the richness of your miniature’s appearance. Glazing can also help soften transitions between different colors and add a polished finish to your work.
How to Glaze Effectively
- Thin Your Paints: Mix your paint with a glazing medium or water until it is very thin and transparent.
- Apply Evenly: Use a soft brush to apply the glaze evenly over the area you want to tint. Allow the glaze to dry completely before applying additional layers.
- Build Up Layers: Apply multiple thin layers of glaze to gradually build up the desired color intensity.
Tips for Advanced Glazing
- Use Complementary Colors: Glazing with complementary colors can create interesting and vibrant effects.
- Control: Apply glazes with controlled brush strokes to avoid streaks and ensure an even finish.
Edge Highlighting
Edge highlighting focuses on the edges of your miniature, using a lighter shade of your base color to create contrast and definition. This technique is particularly effective for hard surfaces like armor and weapons. It requires a steady hand and precise control to achieve clean, crisp lines.
How to Edge Highlight
- Choose a Lighter Shade: Select a lighter shade of your base color for the highlights. For extreme highlights, you can mix your base color with white.
- Use a Fine Brush: Use a fine-tipped brush for precise application. Dedicated edge highlighting brushes can help achieve better results.
- Highlight Edges: Carefully apply the lighter color to the edges of your miniature, focusing on areas that would catch light.
Advanced Tips for Edge Highlighting
- Consistent Line Width: Try to keep the width of your highlights consistent to maintain a uniform look.
- Controlled Brush Strokes: Use controlled, confident brush strokes to avoid shaky lines.
Advanced Miniature Painting Techniques
Wet Blending
Wet blending is an advanced technique that involves mixing two or more colors directly on the miniature to create smooth transitions and gradients. This method requires a lot of practice and control but can produce stunning, lifelike results. It’s particularly useful for painting organic surfaces like skin and cloth.
How to Wet Blend
- Apply Wet Paint: Apply two colors of wet paint next to each other on the miniature.
- Blend with Brush: Use a clean brush to blend the two colors together, creating a smooth transition.
- Work Quickly: Wet blending requires working quickly before the paint dries. Use a retarder medium to extend drying time if needed.
Advanced Tips for Wet Blending
- Practice: Wet blending is challenging and requires practice. Experiment with different color combinations and techniques.
- Patience: Take your time and work in small sections to achieve the best results.
Non-Metallic Metal (NMM)
Non-Metallic Metal is a technique used to paint metallic surfaces without using metallic paints. Instead, you use a combination of greys, whites, and other colors to mimic the appearance of metal. This method can create incredibly realistic effects but requires a deep understanding of light and shadow.
How to Paint NMM
- Choose a Color Scheme: Select a range of colors that will represent the metal, such as greys and whites for silver or browns and yellows for gold.
- Apply Base Coat: Start with a base coat of the darkest color in your scheme.
- Layer and Blend: Gradually layer and blend lighter colors to create highlights and reflections.
Advanced Tips for NMM
- Study Real Metal: Observe real metal objects to understand how light interacts with the surface.
- Highlight Placement: Place highlights carefully to mimic the reflective properties of metal.
Object Source Lighting (OSL)
Object Source Lighting is a technique where you paint light effects directly onto your miniature to simulate a light source, such as a glowing sword or magical aura. This method adds a dramatic and dynamic element to your miniatures but requires a solid grasp of how light interacts with different surfaces.
How to Create OSL
- Determine Light Source: Decide where the light source is coming from and how it will affect the surrounding areas.
- Apply Base Colors: Paint the areas closest to the light source with brighter colors.
- Blend and Highlight: Blend the colors outward, gradually darkening as you move away from the light source.
Advanced Tips for OSL
- Contrast: Use high contrast between light and shadow to enhance the effect.
- Soft Edges: Blend edges softly to create a natural light effect.
Specialized Techniques
Slap Chop Painting Technique
The Slap Chop painting technique involves a fast, rough application of paint to create a worn and weathered look. This method is excellent for painting large armies quickly or adding a gritty, realistic feel to your miniatures. It’s a versatile technique that can be adapted to various styles and finishes.
How to Use the Slap Chop Technique
- Apply Base Coat: Start with a dark base coat to create a foundation.
- Slap on Colors: Use a large brush to apply colors roughly, focusing on areas that would naturally be worn or weathered.
- Chop Away: Use a sponge or dry brush to remove some of the paint, revealing the base coat underneath.
Advanced Tips for the Slap Chop Technique
- Experiment: Experiment with different colors and tools to achieve the desired effect.
- Layering: Apply multiple layers of paint and remove them selectively to create more depth and texture.
Speed Painting Miniatures
Speed painting is all about efficiency and getting your miniatures tabletop-ready in the shortest amount of time possible. This technique often involves the use of washes, dry brushing, and other quick methods to achieve a satisfactory finish without spending hours on each miniature. It’s perfect for gamers who need to paint large armies or for hobbyists with limited time.
How to Speed Paint
- Prime and Base Coat: Use spray primers and base coats to cover large areas quickly.
- Apply Washes: Use washes to add depth and shading with minimal effort.
- Dry Brush Highlights: Quickly highlight raised areas with dry brushing.
Recommended Products for Speed Painting
- Army Painter Quickshade: Provides excellent shading with minimal effort.
- Citadel Contrast Paints: Designed for speed painting, these paints provide base color and shading in one step.
Advanced Tips for Speed Painting
- Batch Painting: Paint multiple miniatures simultaneously to save time.
- Simplified Color Schemes: Use simple color schemes to speed up the process without sacrificing quality.
Tools of the Trade
Dry Brushes for Miniatures
Dry brushes are essential tools for any miniature painter. These brushes have stiff bristles that are perfect for dry brushing techniques, allowing you to apply just the right amount of paint to highlight raised surfaces. Investing in high-quality dry brushes can make a significant difference in the results you achieve.
Recommended Dry Brushes
- Citadel Dry Brushes: Designed specifically for dry brushing, these brushes offer excellent control.
- Army Painter Drybrush Set: A versatile set that includes various brush sizes.
- Vallejo Dry Brushes: High-quality brushes that provide consistent results.
Tips for Using Dry Brushes
- Proper Paint Removal: Ensure you remove enough paint from the brush to avoid overloading.
- Controlled Strokes: Use controlled, light strokes to achieve the best highlights.
Best Airbrush for Scaled Miniatures
An airbrush is a versatile tool that can revolutionize your miniature painting process. It allows for smooth, even coats of paint and is perfect for base coating, shading, and creating gradients. When choosing the best airbrush for scaled miniatures, consider factors like nozzle size, ease of cleaning, and overall build quality.
Recommended Airbrushes
- Iwata-Medea Eclipse HP CS: Known for its reliability and precision, ideal for detailed work.
- Badger Patriot 105: A user-friendly airbrush suitable for beginners and advanced painters alike.
Tips for Using an Airbrush
- Proper Maintenance: Regularly clean your airbrush to ensure consistent performance.
- Practice Control: Practice on spare models to get a feel for the airbrush and improve your control.
Tips for Improving Your Miniature Painting Skills
- Practice Regularly: Like any skill, practice is essential for improvement. Set aside dedicated time each week to work on your miniatures.
- Study Other Artists: Look at the work of other miniature painters for inspiration and to learn new techniques.
- Experiment with Colors: Don’t be afraid to experiment with different color schemes and combinations. This can lead to unique and visually striking miniatures.
- Invest in Quality Tools: High-quality brushes, paints, and other tools can significantly impact the quality of your work.
- Join a Community: Engage with other miniature painters online or in person to share tips, get feedback, and stay motivated.
Conclusion
Unlocking the art of miniature painting involves understanding and mastering various techniques, from basic methods like base coating and dry brushing to advanced techniques like wet blending and object source lighting. By practicing regularly, studying other artists, experimenting with colors, investing in quality tools, and engaging with the community, you can continuously improve your skills and create stunning miniatures.
For more tips on becoming a better miniature painter, check out this insightful article: Tips to Be a Better Miniature Painter. Remember, learning to get better at something is 90% self-confidence and 10% skill. A little advice, guidance, and a pat on the back can go a long way toward achieving your goals.
Happy painting, and may your miniatures come to life with every brushstroke!


